Internet Gateway@Router NetBSD 3.1 dengan ipnat ( Jaring Wireless DSL )
Equipment/perkakas/kelengkapan:
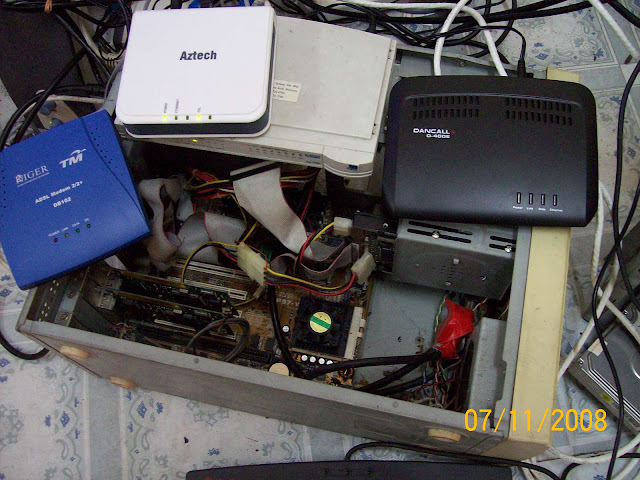
1- Box with NetBSD 3.1 installed - dalam kes ni aku guna old spec, p200/166mmx, RAM 40MB
( later nak test kat p120/100/75 dan 486 ):
cpu0 at mainbus0: (uniprocessor)
cpu0: Intel Pentium/MMX (586-class), 187.14 MHz, id 0x544
cpu0: features 8001bf<FPU,VME,DE,PSE,TSC,MSR,MCE,CX8>
cpu0: features 8001bf<MMX>
2- 2 keping nic tak kisah brand 10-base/100-base, janji jalan ( onboard pun takpe ). Check guna command "dmesg | less"
ex0 at pci0 dev 9 function 0: 3Com 3c905C-TX 10/100 Ethernet with mngmt (rev. 0x74)
ex0: interrupting at irq 10
ex0: MAC address 00:01:02:8c:df:0c
bmtphy0 at ex0 phy 24: Broadcom 3c905C internal PHY, rev. 6
bmtphy0: 10baseT, 10baseT-FDX, 100baseTX, 100baseTX-FDX, auto
vr0 at pci0 dev 10 function 0: VIA VT3043 (Rhine) 10/100 Ethernet
vr0: interrupting at irq 11
vr0: Ethernet address: 00:90:fe:00:eb:bd
dmphy0 at vr0 phy 8: DM9101 (AMD Am79C873) 10/100 media interface, rev. 0
dmphy0: 10baseT, 10baseT-FDX, 100baseTX, 100baseTX-FDX, auto
3- ipnat enabled ( kalau belum enable, aku akan guide nanti how to enable )
4- "seketul" modem wireless DSL jaring SOMA
5- ( optional ) - hub atau switch untuk sambung ke client
6- ( optional ) - UTP crosscable untuk sambung ke client ( 1 client saja )
Cara2:
Mula2 pastikan NetBSD anda dah install cun.. configure ip NIC anda:
1- NIC1 ke modem jaring
2- NIC2 ke LAN/client
NIC 1 aku guna 3Com 3C509C, NIC2 aku guna Laneed ( chipset via rhine ),
so check dalam sistem, ada detect ke tak.. guna:
#ifconfig -a
ex0: flags=8863
capabilities=7
enabled=0
address: 00:01:02:8c:df:0c
media: Ethernet autoselect (10baseT)
status: active
inet XXXXXXXXX netmask 0xfffffc00 broadcast XXXXXXXXXXXX
inet6 fe80::201:2ff:fe8c:df0c%ex0 prefixlen 64 scopeid 0x1
vr0: flags=8843
address: 00:90:fe:00:eb:bd
media: Ethernet autoselect (100baseTX full-duplex)
status: active
inet XXXXXXXXX netmask 0xffffff00 broadcast XXXXXXXXXXXX
inet6 fe80::290:feff:fe00:ebbd%vr0 prefixlen 64 scopeid 0x2
so syntax ex0 untuk 3Com, vr0 untuk via rhine.. bagi yg confuse atau tak biasa dengan BSD-style
punye NIC name nih.. boleh guna "ifconfig -a" atau check ngan command "dmesg | less"
ex0 at pci0 dev 9 function 0: 3Com 3c905C-TX 10/100 Ethernet with mngmt (rev. 0x74)
ex0: interrupting at irq 10
ex0: MAC address 00:01:02:8c:df:0c
bmtphy0 at ex0 phy 24: Broadcom 3c905C internal PHY, rev. 6
bmtphy0: 10baseT, 10baseT-FDX, 100baseTX, 100baseTX-FDX, auto
vr0 at pci0 dev 10 function 0: VIA VT3043 (Rhine) 10/100 Ethernet
vr0: interrupting at irq 11
vr0: Ethernet address: 00:90:fe:00:eb:bd
dmphy0 at vr0 phy 8: DM9101 (AMD Am79C873) 10/100 media interface, rev. 0
dmphy0: 10baseT, 10baseT-FDX, 100baseTX, 100baseTX-FDX, auto
Setkan ip NIC ke modem dulu, cara mudah + simple, set DHCP request saja je NIC1 ( ex0 ):
Internet Software Consortium DHCP Client V3.0.1rc11
Copyright 1995-2002 Internet Software Consortium.
All rights reserved.
For info, please visit http://www.isc.org/products/DHCP
Listening on BPF/ex0/00:01:02:8c:df:0c
Sending on BPF/ex0/00:01:02:8c:df:0c
Sending on Socket/fallback
DHCPREQUEST on ex0 to 255.255.255.255 port 67
DHCPACK from 192.168.0.1
bound to 202.190.132.94 -- renewal in 13643 seconds.
selepas itu setkan ip untuk NIC2 ( vr0 ) untuk sambung ke LAN:
# ifconfig vr0 10.0.0.1 netmask 255.255.255.0
Periksa sekali lagi untuk pastikan ia betul2 menjadi/sempurna:
ex0: flags=8863
capabilities=7
enabled=0
address: 00:01:02:8c:df:0c
media: Ethernet autoselect (10baseT)
status: active
inet 202.190.132.94 netmask 0xfffffc00 broadcast 202.190.135.255
inet6 fe80::201:2ff:fe8c:df0c%ex0 prefixlen 64 scopeid 0x1
vr0: flags=8843
address: 00:90:fe:00:eb:bd
media: Ethernet autoselect (100baseTX full-duplex)
status: active
inet 10.0.0.1 netmask 0xffffff00 broadcast 10.0.0.255
inet6 fe80::290:feff:fe00:ebbd%vr0 prefixlen 64 scopeid 0x2
lo0: flags=8009
inet 127.0.0.1 netmask 0xff000000
inet6 ::1 prefixlen 128
inet6 fe80::1%lo0 prefixlen 64 scopeid 0x3
ok.. dua2 dah menjadi.. untuk memastikan perubahan/setting ip ini tetap/permanent, boleh set ip kat /etc/rc.conf ataupun menggunakan cara "lama" set pada /etc/rc.local. Contoh disini set kat rc.local.. edit file /etc/rc.local guna editor ( vi, nano, pico, dan lain2 ) contoh disini guna nano:
dan edit, tambah baris tadi:
# Add your local daemons here.
#
dhclient ex0
ifconfig vr0 10.0.0.1 netmask 255.255.255.0
exit dan save..
Ok part setting ip dah setel.. actually masa ni, kat box NetBSD dah boleh surf/browse masuk
internet etc2.. boleh test:
Server: 61.6.32.163
Address: 61.6.32.163#53
Non-authoritative answer:
www.yahoo.com canonical name = www.yahoo-ht3.akadns.net.
Name: www.yahoo-ht3.akadns.net
Address: 209.131.36.158
ping www.yahoo.com
PING www.yahoo-ht3.akadns.net (209.131.36.158): 56 data bytes
64 bytes from 209.131.36.158: icmp_seq=0 ttl=49 time=602.937 ms
64 bytes from 209.131.36.158: icmp_seq=1 ttl=50 time=533.233 ms
64 bytes from 209.131.36.158: icmp_seq=2 ttl=50 time=973.181 ms
64 bytes from 209.131.36.158: icmp_seq=3 ttl=50 time=343.097 ms
64 bytes from 209.131.36.158: icmp_seq=4 ttl=50 time=543.037 ms
####################################################
So masuk part kedua..
part nih cuma nak setkan box NetBSD as network gateway ( dan as firewall kalau mahu,tapi bab tu aku tak
kaver la kat sini )
setkan di /etc/rc.conf guna editor anda, tambahkan baris ini:
dalam direktori /etc tambahkan satu fail bernama ipnat.conf dan edit/tambah baris2 yg akan ditunjukkan dibawah:
nano /etc/ipnat.conf
map ex0 10.0.0.0/24 -> 0/32 proxy port ftp ftp/tcp
map ex0 10.0.0.0/24 -> 0/32 portmap tcp/udp 10000:20000
map ex0 10.0.0.0/24 -> 0/32
save dan exit...
selepas itu... Flush, dan run ipnat:
# ipnat -f /etc/ipnat.conf
periksa table ipnat:
List of active MAP/Redirect filters:
map ex0 10.0.0.0/24 -> 0.0.0.0/32 proxy port ftp ftp/tcp
map ex0 10.0.0.0/24 -> 0.0.0.0/32 portmap tcp/udp 10000:20000
map ex0 10.0.0.0/24 -> 0.0.0.0/32
Ok dah jalan... pada client pc, setkan ip serta default gateway 10.0.0.1 ( dalam kes ini menggunakan
windows XP ):
IP Address. . . . . . . . . . . . : 10.0.0.249
Subnet Mask . . . . . . . . . . . : 255.255.255.0
Default Gateway . . . . . . . . . : 10.0.0.1
setelah siap, sila uji connection ke internet...
C:Documents and Settingstrunz>ping www.yahoo.com
Pinging www.yahoo-ht3.akadns.net [209.131.36.158] with 32 bytes of data:
Reply from 209.131.36.158: bytes=32 time=406ms TTL=49
Reply from 209.131.36.158: bytes=32 time=315ms TTL=48
Reply from 209.131.36.158: bytes=32 time=1084ms TTL=49
Reply from 209.131.36.158: bytes=32 time=379ms TTL=48
Ping statistics for 209.131.36.158:
Packets: Sent = 4, Received = 4, Lost = 0 (0% loss),
Approximate round trip times in milli-seconds:
Minimum = 315ms, Maximum = 1084ms, Average = 546ms

walla!! dah jalan.. maka anda boleh tambah seberapa banyak client yg anda suka.. selamat mencuba!
29/ogos/2007 12:5am
Comments (0)
You don't have permission to comment on this page.